

How To Repair A Video Cassette
This guide is for people who want to attempt to repair their own tapes. If you have a broken VHS tape, it's of import to take it properly repaired before going through our VHS to DVD in San Diego, Irvine, LA, or Denver servcies. Go on in mind that video record repair is a delicate process, and any missteps could spell disaster for your video tape. If you'd prefer to let u.s. help you lot out with your repair, you can find more data on our video tape repair page.
For repairing audio cassettes, refer to our How to Prepare an Audio Cassette guide.
For many families, video tapes ofttimes comprise some of the nearly precious memories they have. Since the advent of the camcorder, millions of people worldwide have been filming of import events in their and their family's lives. At some point, many of u.s.a. have had a tape intermission, or a VCR swallow upwards their video tape, resulting in a tape that simply won't play normally anymore. At first glance, you may recall all promise is lost, and your tape is gone forever…but information technology'southward really very easy to repair video tapes yourself! Subsequently reading this guide yous will have the knowledge to not merely repair VHS tapes, but repair video8 tapes, repair betamax tapes, or even repair MiniDV tapes!
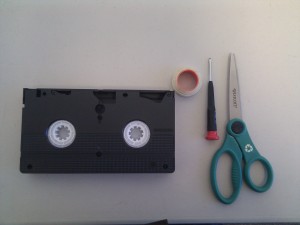
Working with large amounts of older media for some time now, I've seen near every problem a video tape could have. The about common trouble is that the record simple snaps or breaks in the middle somewhere. For this guide, I will be demonstrating the repair of a VHS tape, which is the near mutual tape repair I encounter. To perform your own repair, you will need a phillips screwdriver, some splicing record, scissors, and a steady hand.
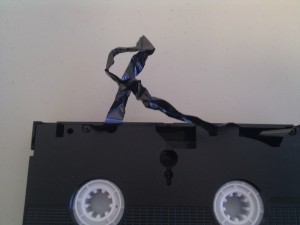
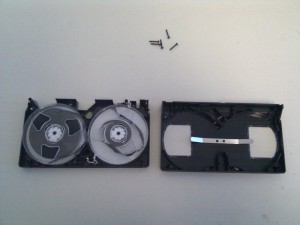
First inspect the record, look under the flap, and see if the tape has been damaged. If the tape has dissever, the prove will be obvious as there would either be a mess of garbled up record:
or no record visible under the protective flap:
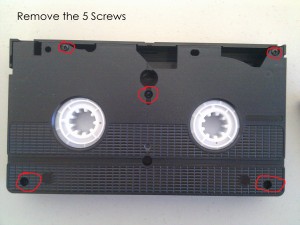
Once you run across that the tape is indeed split, the side by side pace is to open up the casing of the VHS upward. For this pace you lot will need a standard sized phillips screwdriver. The typical VHS cassette contains five screws, one at each corner, and ane in the center.
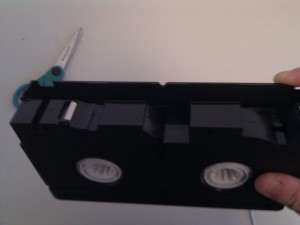
Once you remove all 5 screws, turn the tape OVER, and so the front is facing you, and and then gently rock the casing dorsum and along to elevator it up from the base, taking care not to disturb the internal components also much. If yous labeled your record with a sticker, it may need to be cut down the eye in order to separate the two halves of the casing.
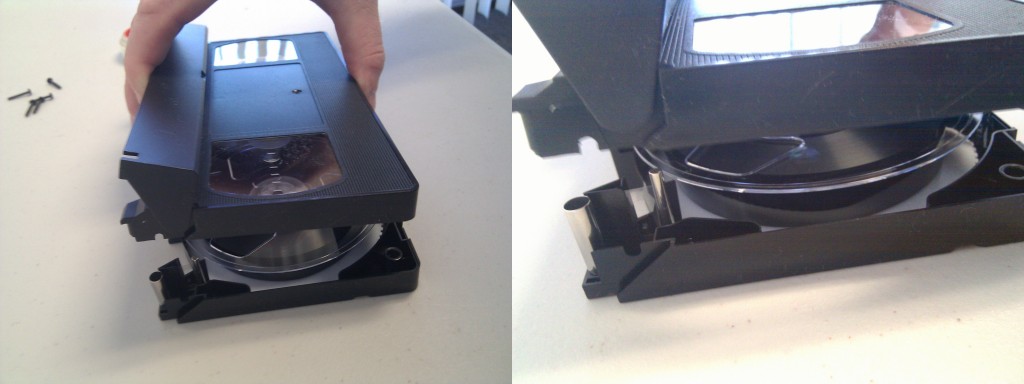
The casing should now await like what I have in the image below. Take special notation of where the internal components are located, in case annihilation should get bumped loose or knocked out of place. Taking a digital photo of the opened case, or having a diagram volition help you with this.
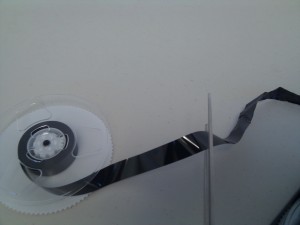
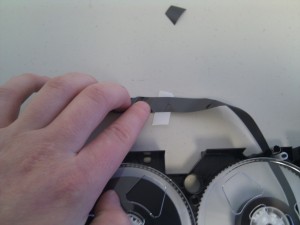
The next step is to give yourself enough "clean" record to work with. If the record has been eaten upward or garbled, or mangled, information technology'south all-time to merely remove all portion of record that has been damaged, so you're left with nothing but make clean undamaged record. Unwind the record from the reels a niggling scrap to give you about 6 inches on both sides. You lot may need to gently lift the reel from the cassette in order to pull some of the record out. Once y'all accept the two ends of tape, take some scissors, and ensure that the tape has been cut with a clean edge. It'southward much harder to splice a tape with a frayed or jagged stop
Cut a small strip of splicing record (scotch record can and volition work, but know that information technology's much thicker and harder to work with than splicing tape and not advised) At present the pull a fast one on is to stick both ends of the video tape as affluent as possible against the splicing tape, it's best to splice the underside of the videotape, but not essential.
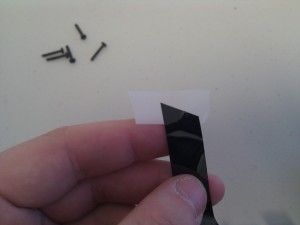
At present your goal is to remove as much of the backlog splicing tape as you can without removing the bodily video record. You can use an x-acto knife if you prefer, only I just utilise pair of scissors. Y'all'll need a pretty steady hand to perform this step successfully. Also, be sure you lot're not letting whatsoever of the tape's glutinous side exposed or showing, as this will gum up tape heads
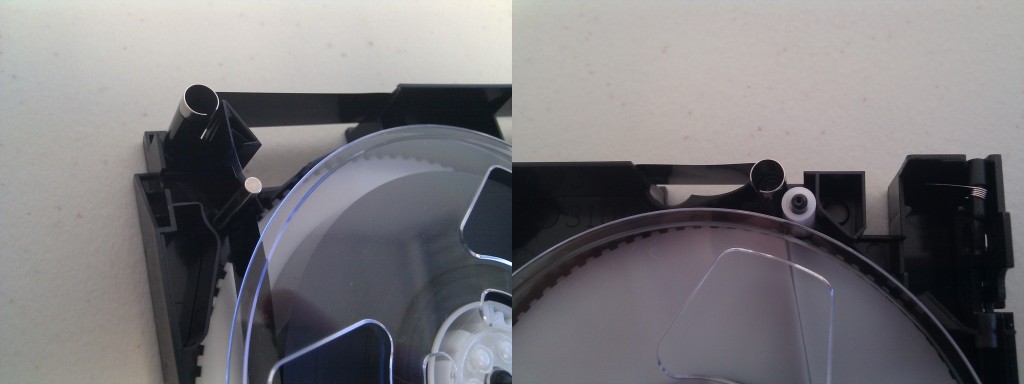
Your video tape should now be all spliced and almost every bit good as new. Now y'all need to run the record through the compression rollers and wrap information technology effectually the top of the cassette. Apply the images below every bit a guide for how the record runs through.
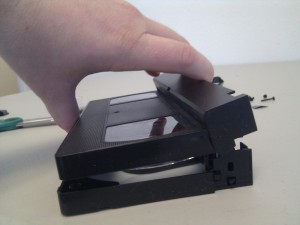
The last pace is to put the casing dorsum together the same fashion you took it apart. Gently rock the peak part of the casing on (You may demand to hold the protective flap upwards as you're plumbing equipment it back on) and and so screw it back together.
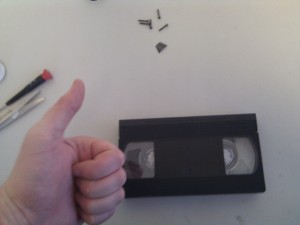
Voila! You lot have, hopefully, at present merely repaired your video tape! Recall, if your tape has been severely damaged, it'due south best to bring the repair job to a professional videotape repair guy who has experience with all types of different media, and the best way to go well-nigh fixing them.
Still need help? Visit our video tape repair page for more information.

Source: https://dvdyourmemories.com/blog/how-to-repair-a-video-tape-a-vhs-repair-guide/
Posted by: boydsopen1958.blogspot.com
0 Response to "How To Repair A Video Cassette"
Post a Comment